Step 1: Create a Custom MOOSE Application
The first step of this tutorial is to create a custom MOOSE application. The application will contain the customized C++ objects created as part of this tutorial for solving the desired problem.
Create a GitHub Account
Development of MOOSE is facilitated by GitHub. It is recommend that applications also use GitHub if possible. Thus, the reader is encouraged to open an account and create a repository to store and track the progress of the new application that will be created. Following the completion of each tutorial step, for which new files have been created and tested, the additions and changes shall be saved (commit) and uploaded (push) to a remote repository.
Run the Stork Script and Initialize the New Application
To begin, please visit the Installing MOOSE page to obtain instructions on how to install the MOOSE dependencies. Once these have been installed, and a local copy (clone) of the MOOSE repository has been downloaded to ~/projects/moose, a template application can be automatically generated. Before proceeding, be sure that the local copy of MOOSE is up-to-date (see Staying Up To Date). MOOSE is constantly evolving, and it is important that the local copy of MOOSE is updated as often as possible to ensure that the application being developed operates with the most current version of MOOSE.
To initialize a new application, a name must be selected. For MOOSE applications, this is usually the name of an animal, e.g., BISON. Sometimes, the application name is also an acronym for a more descriptive title, e.g., MASTODON stands for "Multi-hazard Analysis for STOchastic time-DOmaiN phenomena."
The name Babbler was selected for the application developed throughout this tutorial, but please feel free to choose another name. This tutorial application is designed to teach people the core concepts of MOOSE for creating custom applications. "Babbler" is a reference to pied babblers, an animal known to teach its young (Thorton and Raihani, 2008). A "babbler" is also defined as a "a person who talks constantly", which, in context of the live training, is a fair description of MOOSE team members.
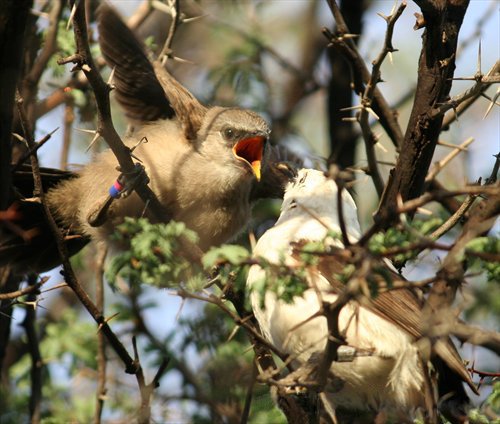
Image of two Southern pied babblers. "Babbler" is used as a placeholder application name in demonstrations provided throughout this tutorial.
Once a name has been selected, execute the following command:
cd ~/projects
./moose/scripts/stork.sh Babbler # substitute "Babbler" for some other name, if desired
This will create a directory ~/projects/babbler that contains a new MOOSE application. The terminal will also prompt the user to initialize the new application as a GitHub repository, which will be discussed in the Enable Use of GitHub section.
Compile the Application Executable
C++ is a compiled language. Therefore, the application code must be first transcribed into a single binary file. During this transcription, the code will be optimized for speed and data allocation. To compile the new application, run the following commands in a terminal (the number following "make -j" should be less than, or equal to, the number of CPUs available):
cd ~/projects/babbler
make -j4
This will create an executable (binary) file called babbler-opt in the application root directory that can be used to run simulations. In addition to the application code, the above command will also compile code available from moose/framework. A MOOSE-based application always has the full power of MOOSE plus its own.
Each time a change is made to a C++ file, the application will need to be recompiled by running make for the changes to take effect.
For more information about compiling MOOSE applications, please visit the MOOSE Build System page.
Test the Application
MOOSE applications have a testing system to quickly verify that the executable was built properly and that the source code is performing as expected. It works by running a simulation and comparing the output to expected results. Once the babbler-opt executable exists, a simple test can be ran:
cd ~/projects/babbler
./run_tests -j4
If the test passed, the terminal output should look something like that shown below.
test:kernels/simple_diffusion.test ........................................................................ OK
--------------------------------------------------------------------------------------------------------------
Ran 1 tests in 0.3 seconds. Average test time 0.1 seconds, maximum test time 0.1 seconds.
1 passed, 0 skipped, 0 pending, 0 failed
Later in this tutorial, the testing system will be explored in greater detail and tests will be created for the Babbler application.
Enable Use of GitHub
Git is a version control system that enables teams of software developers to manage contributions to a single code base. When using Git, a commit is an update to the repository that marks a checkpoint to be revisited even after further changes are made. A repository's commit log shows the history of commits, and helps track the progression of code. A push uploads the local version of the repository to the remote (online) one.
Open an Account
To create an account with GitHub, please proceed to github.com/join and enter your credentials. Keep in mind that the selected username is sometimes required as part of commands for interacting with Git and that it will appear on all published work. It is recommended that the reader choose an alias that is simple, professional, and that they are comfortable with.
Create a Repository
Once an account has been created, Github's root page will transform into the user's personal dashboard. To create a new repository, click on the dashboard link that says "new," and name the repository babbler (or whatever the name of the application directory is). A description of the new MOOSE-based application may be helpful, but the user need not include a README, since the application directory that was created by the stork script already has one.
The stork script initializes a new application with a single git commit whose message is "Initial files." To publish the application to the new GitHub repository, run the following commands:
cd ~/projects/babbler
git remote add origin https://github.com/YourGitHubUserName/babbler
git push -u origin main
The terminal will prompt for GitHub account credentials before uploading the new repository. Once the data has been uploaded it can be viewed at github.com/YourGitHubUserName/babbler.
Interacting with Git Using a Secure Shell (SSH)
As changes to the application are made, and more push commands are ran, it may become a nuisance to enter GitHub credentials each time. To avoid this, it is possible for a user to associate their computer with their GitHub account using SSH. To generate an SSH key, open the terminal and run the following interactive command:
ssh-keygen -t rsa -C YourEmailWhen the terminal prompts about where to save the key, just hit enter to use the default file (~/.ssh/id_rsa.pub). If it asks whether to overwrite the file, enter "y" or cancel and proceed with the existing file. When it asks for a passphrase, leave it blank or else the key will require it every time it is used, which defeats its purpose here. Finally, the unique key is set up and can be printed to the terminal:
cat ~/.ssh/id_rsa.pubCopy the output from the terminal, which should begin with ssh-rsa and end with YourEmail. Then, in the GitHub account Personal settings page, navigate to the "SSH and GPG keys" tab and paste the output to the "New SSH key" form. This machine will now have secure access to GitHub.
The local repository, where the new application has been stored, needs to be linked to the SSH version of the remote url:
cd ~/projects/babbler
git remote set-url origin git@github.com:YourGitHubUserName/babbler.git
From now on, credentials are no longer required when interacting with this repository from the terminal. There are a lot of ways to interact with Git, and the reader is encouraged to learn more at their own will.
For more information about Git, please visit the Git page.